How Alien Designed Simplinvest with Aditya Birla Capital Digital
October 17, 2025
3 min


Source: Image
Webflow has become one of the go-to tools for building beautiful, flexible websites in the age of no-code web design and commerce platforms. But designing a visually polished site is only part of the equation; you’ll often need to accept payments, whether for digital goods, services, or subscriptions. That’s where Webflow Stripe Integration comes in, not just as a tool, but as the bridge that turns browsers into buyers and design into revenue.
But this isn’t just another “how-to.” We’re diving deep into real-world use cases, common pitfalls, and how professional Webflow Stripe Integration Services can elevate your workflow. You’ll discover how to connect Stripe securely, generate a payment link, and build a conversion-focused Webflow integration strategy that’s future-proof.
So if you’ve ever asked, “How do I use Stripe on my Webflow site?” You’re in the right place.
Let’s explore how to integrate Stripe with Webflow the right way for smart, scalable, and built to grow with your business.
If you're looking for a reliable and scalable payment solution, Stripe with Webflow is one of the top options. Stripe integration supports global payments, subscriptions, and one-time purchases, all while keeping your users on your branded Webflow site.
Stripe is a globally recognized payment gateway that allows businesses to accept payments online easily. It supports credit/debit cards, Apple Pay, Google Pay, and various local payment methods, making it versatile for global customers.
Webflow is a no-code website builder that empowers users to create custom websites with advanced functionality, without touching a line of code. For e-commerce, Webflow offers built-in capabilities for product management, checkout, and cart experiences.
Source: Image
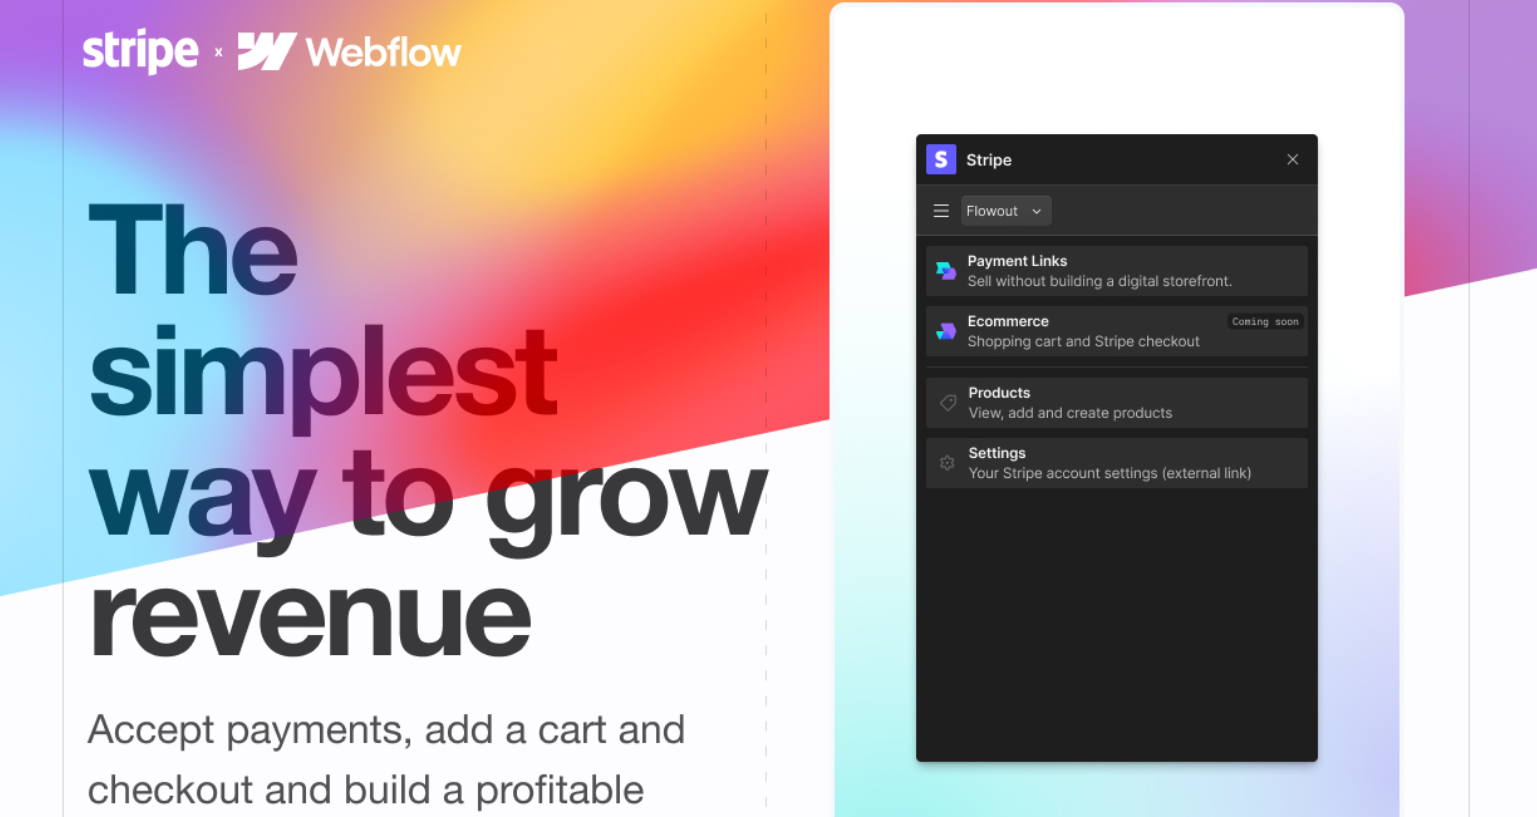
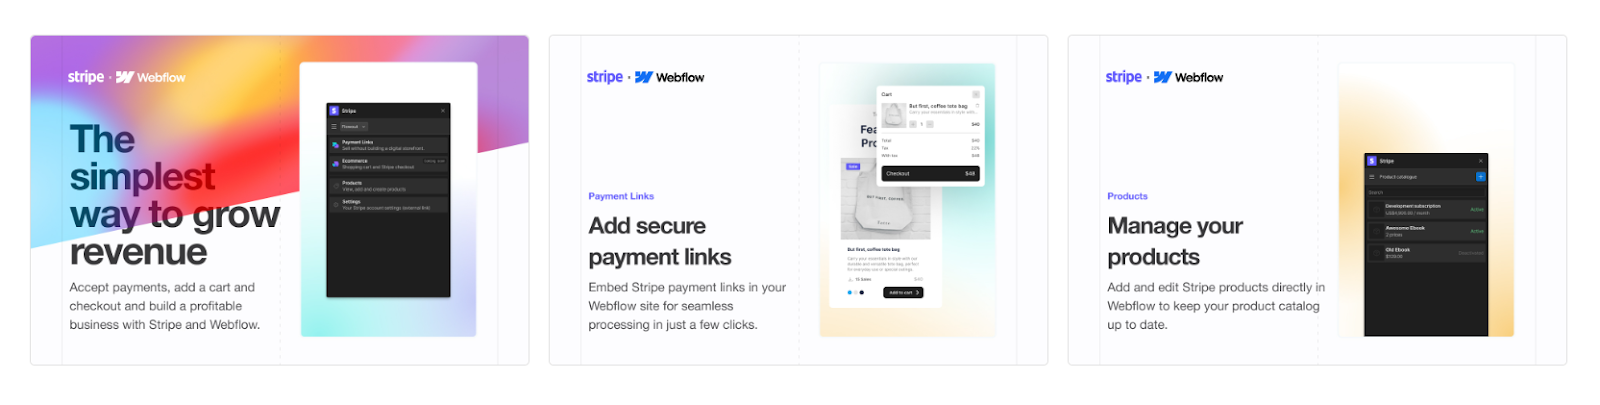
The Webflow Stripe integration allows you to connect Stripe as your payment processor, enabling real-time payments directly on your Webflow site. This means customers can complete purchases without being redirected, increasing conversion rates and providing a professional checkout experience.
Some benefits of this Stripe integration include:
The beauty of the Stripe with Webflow ecosystem is that there’s more than one way to achieve the integration, accommodating different business models and technical comfort levels. Now let’s get into the details of the Webflow Stripe setup process. There are a few different ways you can connect Stripe to Webflow, depending on your needs.

Source: Image
First things first, you need a Stripe account. Visit stripe.com and sign up. Make sure you verify your identity and business details to unlock full payment processing capabilities.
If you’re using Webflow’s built-in ecommerce features, integrating Stripe is incredibly straightforward.
Once connected, you can immediately begin accepting payments through your Webflow store using Stripe.
Tip: Always test your checkout process in test mode before going live.
What if you're not using Webflow’s ecommerce feature but still want to collect payments? You have options.
Stripe allows you to generate payment links for products or services. You can embed these directly into your Webflow site using buttons or text links.
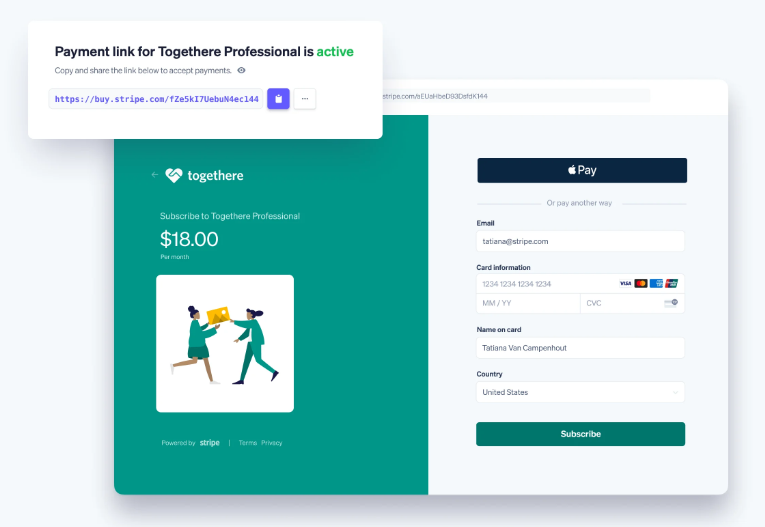
Source: Image
How to do it:
This is perfect for one-off payments, donations, or even recurring services.
For more control, you can embed Stripe Checkout using custom HTML and JavaScript.
Here’s how to integrate Stripe with Webflow manually:
Note: This method may require developer assistance or access to backend tools like Zapier, Make, or Firebase for session handling.
If your needs go beyond simple payment collection, you may want to explore professional Webflow Stripe Integration Services.
These services often include:
Agencies or freelancers offering these services can help integrate Stripe with Webflow in more complex and scalable ways.
Regardless of which Stripe with Webflow method you choose, understanding the underlying payment process is key to a successful launch. When a customer clicks a 'Pay Now' or 'Subscribe' button:
The primary advantage of using Stripe is that it handles PCI (Payment Card Industry) compliance. For both the native Ecommerce and the Payment Links methods, the customer's sensitive card data never touches your Webflow site. It is entered directly into Stripe's secure, certified environment. This greatly reduces your liability and the complex requirements of data security.
For recurring revenue, Stripe’s subscription features are essential.
Native Ecommerce: The Webflow Ecommerce platform supports recurring billing for digital products and services. You configure the subscription logic (e.g., monthly price) within the Webflow product settings, and Stripe manages the billing cycles, failed payment notifications, and renewals automatically.
Payment Links/Custom: Using a Stripe Payment Link in subscription mode is the simplest way to sell recurring plans outside of native Ecommerce. For full control, a custom integration via a service like Memberstack allows you to use Stripe to gate content on your Webflow site, creating protected areas only accessible to paying subscribers.
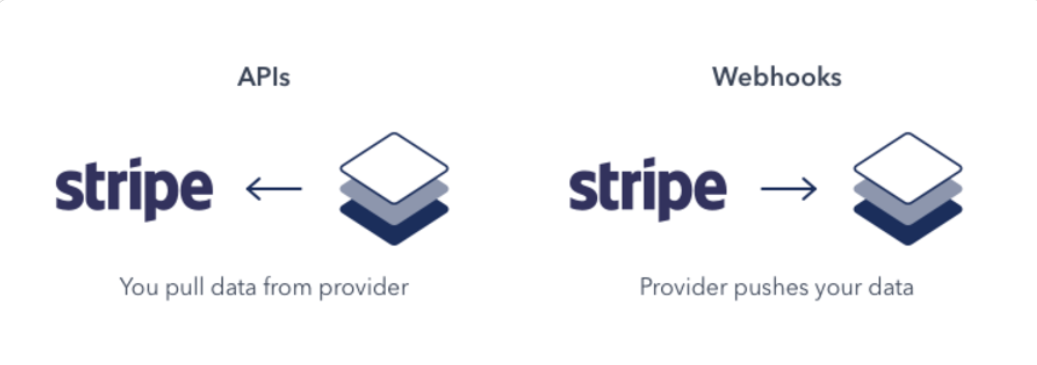
Webhooks are crucial for advanced automation and are the nervous system of a sophisticated stripe integration. A webhook is an automatic notification that Stripe sends to your application whenever a specific event occurs (e.g., payment_intent.succeeded or customer.subscription.deleted).
Source : Image
Automation: By capturing these events using a tool like Zapier or Make, you can automatically trigger actions on your Webflow site. For example, a successful payment (a webhook event) could automatically create a new item in your Webflow CMS (the action) or send a custom welcome email. This allows for powerful custom workflows and business logic.
Successfully connecting Stripe and Webflow goes beyond simply making the button work. Implementing these best practices will optimize your conversion rates and reduce support headaches.
Before going live, you must test the entire payment process from the customer's perspective.
The checkout is the most critical part of your sales funnel.
The global payments landscape is constantly evolving (e.g., SCA in Europe, new data privacy laws).
Now that you're up and running, here are some tips to ensure your Stripe and Webflow setup is optimized for performance and security.
Security is crucial when handling payments. Make sure SSL is enabled:
This ensures encrypted communication and boosts customer trust.
Stripe provides detailed analytics and transaction logs in your Stripe account dashboard. Check these regularly to:
Use optimized images, limit third-party scripts, and leverage Webflow's CDN to ensure your Webflow site loads quickly—even during heavy traffic.
While Stripe integration for Webflow is generally smooth, here are a few common issues:
Problem: Payment not showing up in Stripe
Solution: Ensure you’re in “Live Mode” and have completed the full Stripe onboarding process.
Problem: Checkout button not working
Solution: Double-check your embed code, ensure SSL is enabled, and test with multiple browsers.
Problem: Customers not receiving confirmation
Solution: Set up webhooks in Stripe to trigger email confirmations or integrate with tools like Zapier or Mailchimp.
The Webflow Stripe Integration is a powerful way to blend beautiful design with robust payment processing. Whether you’re running an ecommerce store, offering services, or collecting donations, using Stripe with Webflow gives you the tools to grow your business with confidence.
The right Stripe integration for Webflow depends on your business needs. No matter what route you take, integrating Stripe with Webflow gives you the flexibility to run a modern online business beautifully and securely.
Integrating Stripe with Webflow doesn't have to be complicated, but getting it right can make all the difference in your payment flow, customer experience, and conversion rates.

Source: Image
That’s where Alien Design Studios - a certified webflow agency, comes in.
Whether you need:
Looking to Connect Stripe and Webflow Without Coding? Our team of no-code and low-code experts can build exactly what you need - fast, secure, and scalable.
Let’s build your next big thing. Contact Alien Design Studios to know more or to book a consultation today.
.svg)


REGISTERED IN Chennai, INDIA.
"Global Team, Building for the world"


.webp)